Difference between revisions of "Slicer3:Diffusion Editor"
| Line 44: | Line 44: | ||
*measurement frame (gui/load/change/save): 95% | *measurement frame (gui/load/change/save): 95% | ||
*gradients (gui/load/change/save): 95% | *gradients (gui/load/change/save): 95% | ||
| − | *test: | + | *test: 75% |
| − | ** tensor estimation with existing clm: | + | ** tensor estimation with existing clm: 70% |
| − | ** tractography fiducial seeding: | + | ** tractography fiducial seeding: 90% |
*writing master thesis: 5% :-) | *writing master thesis: 5% :-) | ||
Revision as of 02:54, 13 March 2008
Home < Slicer3:Diffusion EditorContents
Overview
The goal of this project is to add a Gradient Editor for DWI data in the Volumes module of Slicer3. As the documentation of gradients in dicom data is not standardized, MRI scanners handle them differently. Because of that there is a big need to add/modify gradients manually.
Background (why specific editor features are needed)
TODO
Interface
This screenshots show the interface and its changes during the last months.
- Interface
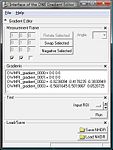
1st Version (tcl)

integrated in Slicer3 branch
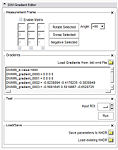

integrated in Slicer3 trunk, some GUI elements are no longer necessary


How to use the editor
- 1.Step: Generate a Nrrd-header of your DWI data. Use the "Dicom to Nrrd" module in Slicer3 (Modules->Converters->Dicom to Nrrd).
- -> A .nhdr file will be created.
- 2.Step: Use the output (.nhdr file) as an input of the Volumes module.
- -> The Gradient Editor will be enabled. If you load any other type of dataset the editor will be disabled.
What you can do with the Gradient Editor
TODO: more details.
- Choose measurement frame.
- Negative: Select the columns you want to negative.
- Swap: Select two columns you want to swap.
- Rotate: Select one column you want to rotate by an angle you can choose from a given set of values or set yourself.
- Set your own values.
- Define gradients.
- If the .nhdr file has the information about the gradients, the editor will put them in the text field.
- You can copy/paste your own gradients in the text field.
- You can load gradients from a plain text file or .nhdr file.
- Run test.
- Add a Fiducial List. To see if the chosen parameters are reasonable, you can run a test that automatically
- computes the Tensor and
- visualizes them by Tractography Seeding. (both with standard values)
- Add a Fiducial List. To see if the chosen parameters are reasonable, you can run a test that automatically
- Undo: Undo the last change of measurement/gradient values.
- Restore: All parameters are restored to original.
Status / Implementation Progress
The editor is now successfully integrated in the Volumes module of the trunk version of Slicer3.
- measurement frame (gui/load/change/save): 95%
- gradients (gui/load/change/save): 95%
- test: 75%
- tensor estimation with existing clm: 70%
- tractography fiducial seeding: 90%
- writing master thesis: 5% :-)
Additional Information
Nrrd format: http://wiki.na-mic.org/Wiki/index.php/NAMIC_Wiki:DTI:Nrrd_format
DTMRI: http://wiki.na-mic.org/Wiki/index.php/Slicer3:DTMRI
DICOM for DWI and DTI : http://wiki.na-mic.org/Wiki/index.php/NAMIC_Wiki:DTI:DICOM_for_DWI_and_DTI