Difference between revisions of "Slicer3:openIGT Tutorial For 4D Volume Rendering Data"
From NAMIC Wiki
| Line 7: | Line 7: | ||
== Setting up the 3D Slicer == | == Setting up the 3D Slicer == | ||
#Start up Slicer3 | #Start up Slicer3 | ||
| + | #Select the OpenIGTLink Module from the Modules Tab [[Image:Slicer3_Select_OpenIGTLinkModule.png|thumb|none|Select the OpenIGTLink Module]] | ||
#Go to Edit -> Application Settings Slicer Settings | #Go to Edit -> Application Settings Slicer Settings | ||
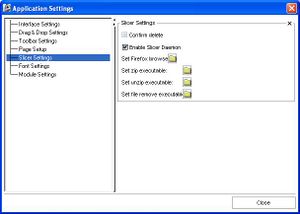
## Check the Enable Slicer Daemon. [[Image:Slicer3_Enable_Slicer_Daemon.png|thumb|none|Enabling Slicer Daemon]] | ## Check the Enable Slicer Daemon. [[Image:Slicer3_Enable_Slicer_Daemon.png|thumb|none|Enabling Slicer Daemon]] | ||
Revision as of 19:32, 26 March 2008
Home < Slicer3:openIGT Tutorial For 4D Volume Rendering DataThis tutorial will teach you how to setup Slicer3 and an image provider to send and display 4D image data.
Contents
Prepare Slicer3
Downloading and Compiling the source
- Download and Compile a copy of Slicer as described in Slicer3:Build_Instructions.
- !! use http://www.na-mic.org/svn/Slicer3/branches/igt_cuda_merge as the source !!
Setting up the 3D Slicer
- Start up Slicer3
- Select the OpenIGTLink Module from the Modules Tab
- Go to Edit -> Application Settings Slicer Settings
- Check the Enable Slicer Daemon.
Prepare the Image Provider
Downloading and Compilation
- Check out the Server code from http://www.na-mic.org/svn/NAMICSandBox/trunk/BRPTools/ScannerIO
svn co http://www.na-mic.org/svn/NAMICSandBox/trunk/BRPTools/ScannerIO
- Compile the Code
   cmake .
   make

