OpenIGTLink/TryVersion2
Contents
How to Try Protocol Version 2 using OpenIGTLink Library
The OpenIGTLink Protocol Version 2 is still in a draft phase, but you can try some of new features using The OpenIGTLink Library. Here're some tips. Please note that the version 2 protocol is still in it's draft stage and not fixed at this moment.
Build Instruction
The OpenIGTLink library is available at NAMICSandBox (http://svn.na-mic.org/NAMICSandBox/trunk/OpenIGTLink). You can download using Subversion client. If you are using a terminal on Linux or Mac OS X, do:
cd <working directory>
svn co http://svn.na-mic.org/NAMICSandBox/trunk/OpenIGTLink OpenIGTLink
The next step is to build the library with example programs. In the default setting, message types defined as part of version 2 will not be compiled. To use them, OpenIGTLink_PROTOCOL_VERSION_2 option should be turned on when you configure the source code. If you are using cmake tool in a terminal, do:
mkdir OpenIGTLink-build
cd OpenIGTLink-build
cmake -DBUILD_EXAMPLE:BOOL=ON -DOpenIGTLink_PROTOCOL_VERSION_2:BOOL=ON ../OpenIGTLink
Once the library is successfully built, the all example programs are in <working directory>/OpenIGTLink-build/bin
Trying Example Programs
Image meta list
Will be added soon.
Label meta list
Will be added soon.
Label meta list
Will be added soon.
How to Try Protocol Version 2 using 3D Slicer
The OpenIGTLink IF module with version 2 features is available in 3D Slicer version 3.7 alpha after June 11, 2010. Here's an instruction to try OpenIGTLink Protocol version 2 with 3D Slicer. The 3D Slicer with OpenIGTLink version 2 interface has been moved to the oldtrunk repository. In the following section, please use http://svn.slicer.org/Slicer3/oldtrunk instead of http://svn.slicer.org/Slicer3/trunk.
Step 1: Getting 3D Slicer
You can obtain the software in two ways:
- Download Nightly build. The binaries for Windows, Linux and Mac OS X is available at 3D Slicer download page. Please choose
- Type of download: Nightly builds
- Operating system: 3.7 alpha
- File to download: a binary for your operating system released after June 11, 2010.
- Build 3D Slicer your self. You may build 3D Slicer on Windows, Linux or Mac. The instruction is available at 3D Slicer Build Instruction Page.
Step 2: Setting up dummy server program
Several types of dummy server programs are available in the OpenIGTLink library. Please refer the instruction above to build it. Since the dummy server programs are not compiled, please make sure that BUILD_EXAMPLES option is ON. If the build process goes well, you could find example programs in <working directory>/OpenIGTLink-build/bin. (If you are using Visual Studio, the file may be in <working directory>\OpenIGTLink-build\bin\Debug or <working directory>\OpenIGTLink-build\bin\Release)
Step 3: Accessing remote image database through OpenIGTLink
1. Start ImageDatabaseServer
ImageDatabaseServer is a dummy server program comes with the OpenIGTLink library. From a terminal, run ImageDatabaseServer as:
$ ./ImageDatabaseServer 18944 <OpenIGTLink source directory>/Examples/Imager/img/
The first argument is a port number used by the dummy server program. The second file specifies a path to a directory that contains sample image files.
2. Start up 3D Slicer and connect to the dummy server
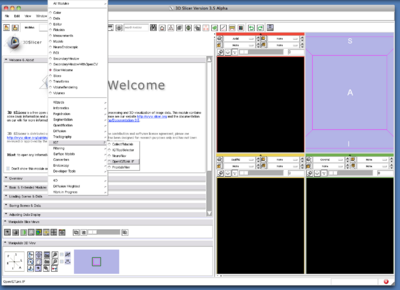
Open OpenIGTLinkIF module, which is in IGT section in the module menu (see the screen shot bellow).
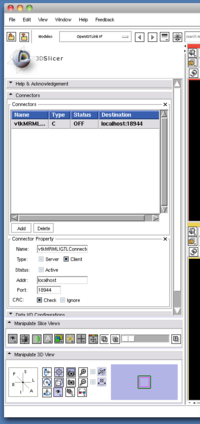
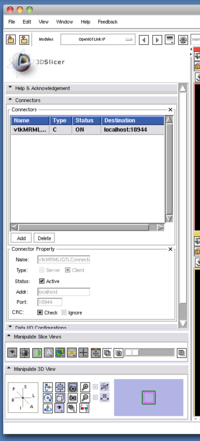
To connect to the dummy server, first, open Connectors tab, press Add button under the connector list, configure the properties as:
- Name: no need to edit. It is usually vtkMRMLIGTLConnectorNode1
- Type: Client
- Status: do not check until other properties are set.
- Addr: localhost (if you are running ImageDatabaseServer on the same host)
- Port: 18944
- CRC: Check
After entering those properties, click the Active check box. If 3D Slicer is successfully connected to the dummy server, the Status column in the connector list becomes ON.
3. Open remote data list window
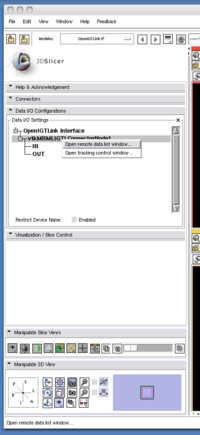
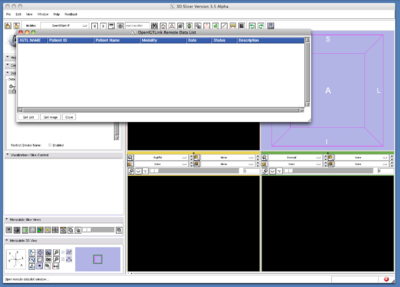
To open the remote data list window, first, open Data I/O Configurations tab, right-press the connector you've created in the previous section (usually vtkMRMLIGTLConnectorNode1) to show a context menu (you need to keep mouse button down to show the menu), and choose Open remote data list window. You will see a new window.
4. Get a list from the server
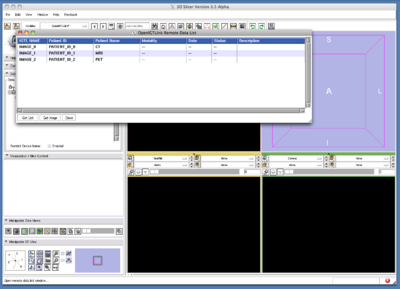
On the remote data list window, click Get List button. List of images appears immediately.
5. Get images from the server
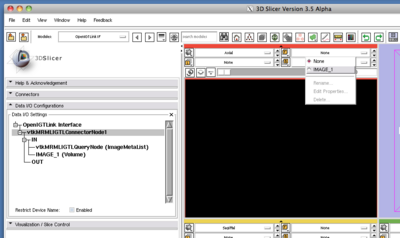
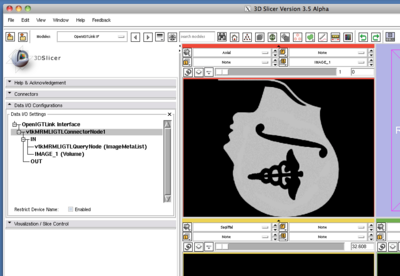
Select one image on the list by clicking, and then click Get Image button. The image will be automatically loaded on 3D Slicer. To view it, go to the main window and select the image from the list as shown in the figure.
